Testnet
We recommend to use Qubic Lite Core to create a local testnet instead of using VM to run .efi (tutorial below). It's much more easy to start!
Now let's learn how to deploy your custom smart contract to the Qubic Testnet. Unfortunately, deploying your contract requires setting up and running your own Qubic node on virtual machine, which can be a complex and challenging task.
But don't worry — we're here to help you through it, step by step.
Qubic has a public testnet, but deploying your contract requires assistance from the Qubic developers. To proceed, join their Discord and reach out to them directly.
Requirements
- A server or computer with at least 8 CPU cores (high-frequency CPU with AVX2 support).
- At least 64 GB of RAM.
- A 100 Mbps synchronous internet connection.
Pre-Setup: Configure UTC Time on Your Machine
A good place to rent the server with low cost is hostkey.com. Make sure to choose a dedicated machine (Baremetal) (eg., bm.v1-big), not a VPS. To minimize potential issues, please use Ubuntu 22.04.
If your node logs appear choppy or laggy in RDP, it's likely that your CPU is too slow and not suitable for running a Qubic Core node.
Prepare Qubic.efi
Intergrate SC
To run the core node as a testnet with 64 GB, some configuration changes are required. Instead of modifying manually, you can clone the core node repository and switch to the testnets/release-xxx branch. Integrate your smart contract into this branch.
To manually update the testnet configuration, see: https://github.com/qubic/core/commit/2beb2c227fb79225aa30d08adc155288b7e2f29d
Change Public And Private Settings
After integrate your custom sc, you will also need to change some settings:
- Edit
private_settings.hand updatecomputorSeedswith 676 seeds:
static unsigned char computorSeeds[][55 + 1] = {
  // Place your 676 seeds here
  // https://github.com/hackerby888/core-docker/blob/main/computorSeeds.txt
};
- Add your node IPs in
private_settings.h
static const unsigned char knownPublicPeers[][4] = {
    {192, 168, 1, 101}, // Your own node ip
};
- Change Epoch and Initial Tick in
public_settings.h
#define EPOCH 170
#define TICK 18480000
The EPOCH must match your spectrum.EPOCH, universe.EPOCH and contracts files (eg., spectrum.170)
- Change ARBITRATOR in
public_settings.h
#define ARBITRATOR "GVNXISEPVVSOQADMESMUYXNXABBCYFNKGPSNSSILQBOULADLKGWGXAFBCHXH"
You must use the above ARBITRATOR ID. Otherwise, your broadcasted computor packets will be ignored and your node won’t tick.
Now build the Qubic project in Release mode to generate the Qubic.efi.
Prepare Contract State File
The contract state file is a binary file that stores your contract’s state and is required when starting the Qubic node.
Below is a test case to generate the binary contract state file. Insert this in your contract’s test suite and execute it:
TEST(Contract, GenerateContractState) {
    // Change QNS to your contract struct
    QNS* s = new QNS();
    memset(s, 0, sizeof(QNS));

    FILE* f;
    auto error = fopen_s(&f, "contract0013.170", "wb"); // Remember to replace with correct contract index and epoch
    if (error != 0 || f == nullptr) {
        std::cerr << "Error opening file" << std::endl;
        delete s;
        return;
    }

    size_t written = fwrite(s, sizeof(QNS), 1, f);
    if (written != 1) {
        std::cerr << "Error writing to file" << std::endl;
        fclose(f);
        delete s;
        return;
    }

    if (fclose(f) != 0) {
        std::cerr << "Error closing file" << std::endl;
        delete s;
        return;
    }

    std::cout << "Written successfully" << std::endl;
    delete s;
}
The binary contract file will be generated in the current working directory when the test runs. For example, if you're in C:\Users\Admin\ and run C:\Users\Admin\Projects\core\x64\Release\test.exe, the output file will appear in C:\Users\Admin\.
Prepare Epoch Zip File
Now that you have Qubic.efi and contract00xx.XXX, you need to package them with the rest of the system files.
To get the latest files, join the Qubic Discord, open the computor-operator channel, and download the latest epxxx.zip file from the pinned messages.
-
Unzip the
.zipfile. -
Add
contract00xx.XXXto the folder (Don't need to copyQubic.efibecause we will copy it using scripts in later step). -
Replace the
spectrum.xxxfile with the above one (remember to rename the epoch). Using the provided spectrum file will give your testnet seeds 15B QUs. -
Repack the folder into a
.ziparchive.
Setup Enviroment And Start The Node
We are recommend to use Ubuntu 22.04
Transfer Qubic.efi and epxxx.zip to your VM.
Install VirtualBox:
apt update
apt install -y freerdp2-x11 git cmake docker.io libxcb-cursor0 sshpass gcc-12 g++-12 dkms build-essential linux-headers-$(uname -r) gcc make perl curl tree unzip

wget https://download.virtualbox.org/virtualbox/7.1.4/virtualbox-7.1_7.1.4-165100~Ubuntu~jammy_amd64.deb
wget https://download.virtualbox.org/virtualbox/7.1.4/Oracle_VirtualBox_Extension_Pack-7.1.4.vbox-extpack

dpkg -i virtualbox-7.1_7.1.4-165100~Ubuntu~jammy_amd64.deb
apt --fix-broken install -y

# Install VirtualBox Extension Pack with auto license acceptance
VBoxManage extpack install Oracle_VirtualBox_Extension_Pack-7.1.4.vbox-extpack --accept-license=eb31505e56e9b4d0fbca139104da41ac6f6b98f8e78968bdf01b1f3da3c4f9ae

# Remove VirtualBox kernel modules and reconfigure
modprobe -r vboxnetflt vboxnetadp vboxpci vboxdrv
/sbin/vboxconfig
Download and extract the Qubic VHD:
wget https://files.qubic.world/qubic-vde.zip -O /tmp/qubic-vde.zip

unzip -o /tmp/qubic-vde.zip -d /root/
Clone the helper script repo:
git clone https://github.com/hackerby888/core-docker.git
Jump to the core-docker folder
cd core-docker
Run the script
chmod +x ./run_on_host.sh
./run_on_host.sh --epoch 170 --vhd ./qubic.vhd --port 31841 --memory 65536 --cpus 8 --epzip ./ep170.zip --efi ./Qubic.efi --headless
Be sure to adjust the epoch, path to qubic.vhd, Qubic.efi and epxxx.zip as needed.
Successful launch output:
=================== LAUNCH QUBIC ON HOST ===================
 EPOCH_NUMBER       = 170
 QUBIC_VHD          = ./qubic.vhd
 PORT               = 31841
 MEMORY_MB          = 65536
 CPUS               = 8
 EP_ZIP             = ./ep170.zip
 QUBIC_EFI          = <none>
 SPECTRUM_000       = <none>
 HEADLESS           = 1

...
...

VHD modification completed successfully. Will unmount/detach on exit.
Unmounting /mnt/qubic...
Detaching loop device /dev/loop0...
Virtual machine 'Qubic' is created and registered.
UUID: 96fd1d76-3e97-45d6-a530-9d388f9d7d90
Settings file: '/root/VirtualBox VMs/Qubic/Qubic.vbox'
Starting VM in headless mode (RDP available on port 5000)...
Waiting for VM "Qubic" to power on...
VM "Qubic" has been successfully started.
VM 'Qubic' started successfully.
Watch Node Logs
You can use Remote Desktop Connection in Window with NODE_IP:5000 to see the logs.

Make The Node Ticking
To be able to make transactions, invoking contract procedures, your node must ticking.
Enable MAIN/MAIN mode
- Press F12 three times while the node is running to switch to
MAIN/MAINmode.
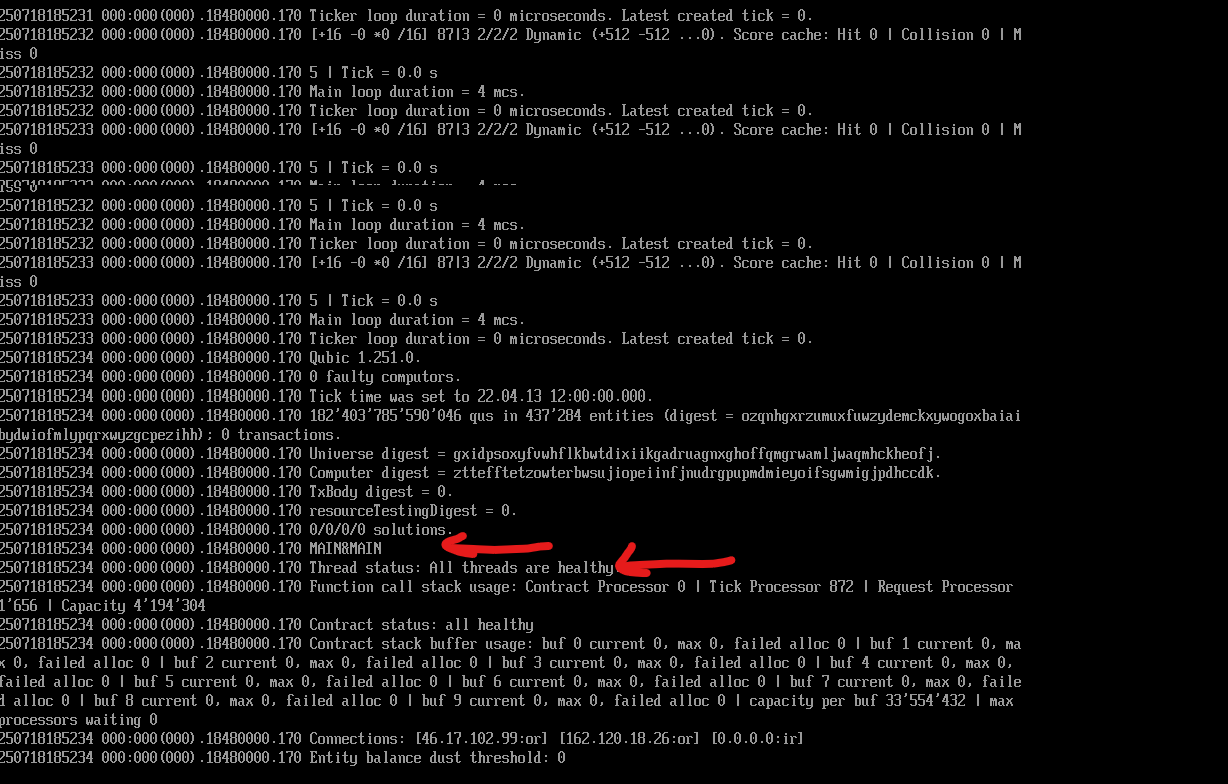
Press F2 to see above screen
Broadcast Computor
chmod +x ./broadcastComputorTestnet
./broadcastComputorTestnet <ip> <epoch> <port>
- ip: The IP address of the node where you want to send the indices.
- epoch: The epoch number (e.g., 170).
- port: The port used by the node (e.g., 31843).
Example output:
root@31217:~/core-docker#  ./broadcastComputorTestnet 162.120.18.26 170 31841
Broadcasting computor list to 162.120.18.26:31841 epoch 170
sent 21708 bytes
Press the PAUSE or P key to display the verbose log, which shows how many indices you have.
And your node should display the following screen:
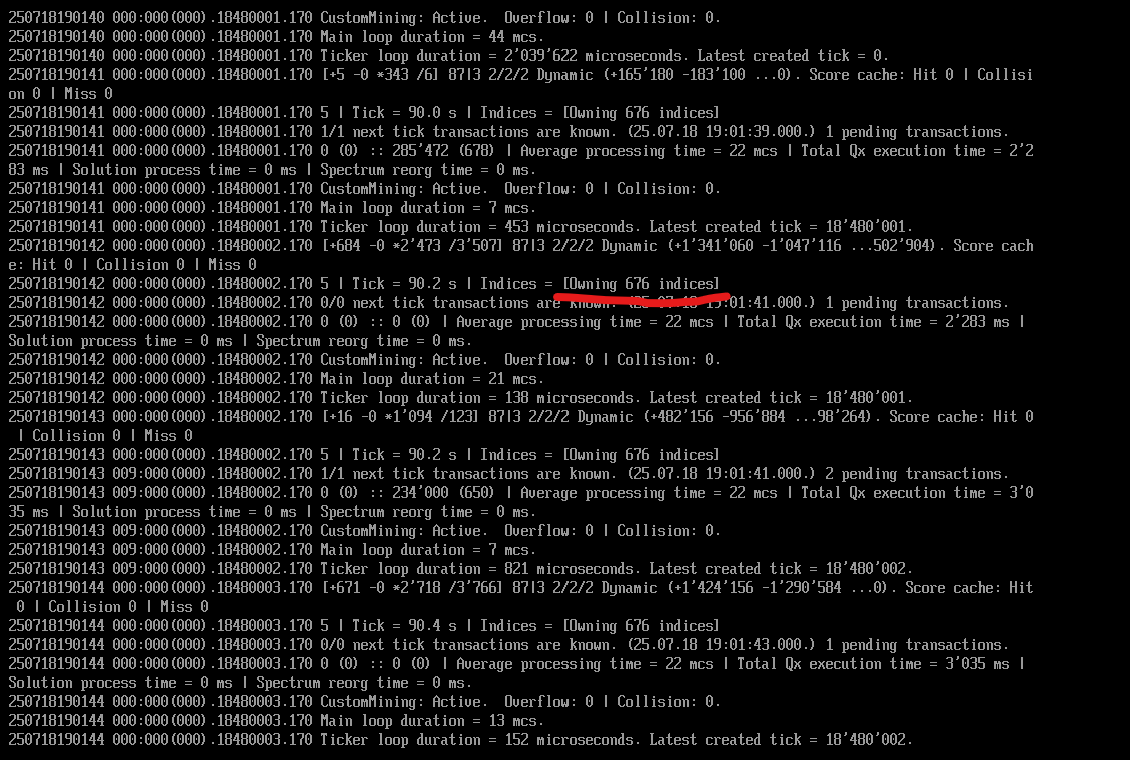
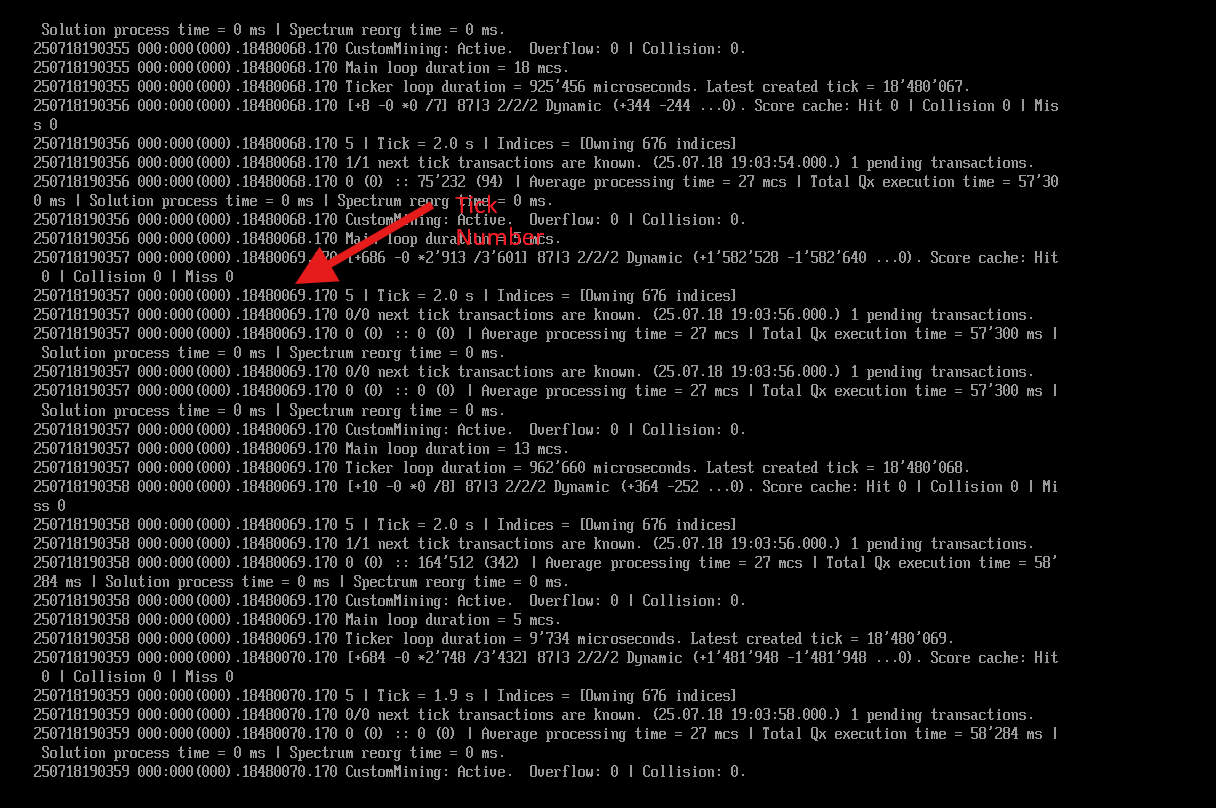
Once receive computors list, your node should begin ticking:
Useful Commands
PowerOff Qubic Node
VBoxManage controlvm "Qubic" poweroff
PowerOn Quic Node
VBoxManage startvm "Qubic" --type headless
Delete Qubic Node
VBoxManage unregistervm "Qubic" --delete
This will also delete your qubic.vhd file. To keep VHD remove the --delete
References
https://github.com/KavataK/QubicNetworkDeploymentGuide